Size Your Locket Images for Your Personalized Lockets
Mar 2nd 2022
by Barry Torman
You’ve found the perfect locket... but how do you get that teeny tiny picture in there?
Getting down to size: How to shrink your locket picture
Using programs like ‘Corel’ or ‘Photoshop’ make this a simple process. For those of us that don’t have those programs, using a simple Windows Paint program can get the job done.
As I’m a daddy’s girl, I used a picture of my dad and me to put in my locket! Follow along with these easy steps.
Windows Paint
Step 1
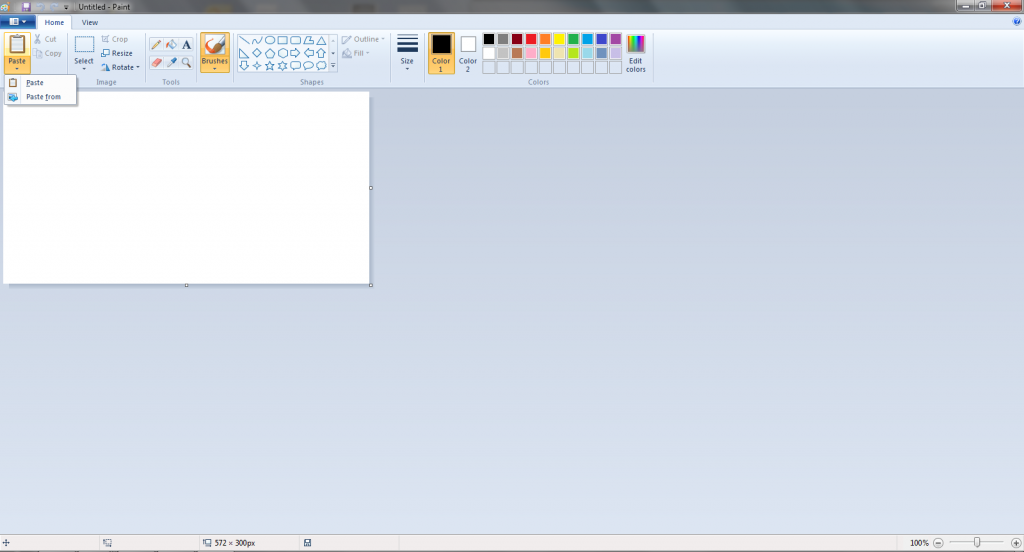
Open the image you’d like to use in the paint app. Select ‘File’, then ‘Paste From’, then select your picture.
Step 2
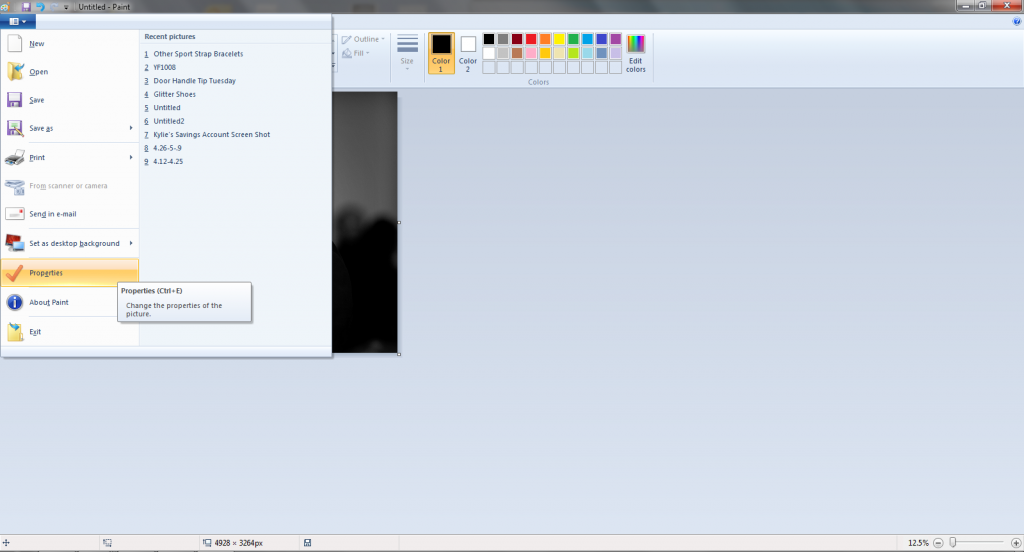
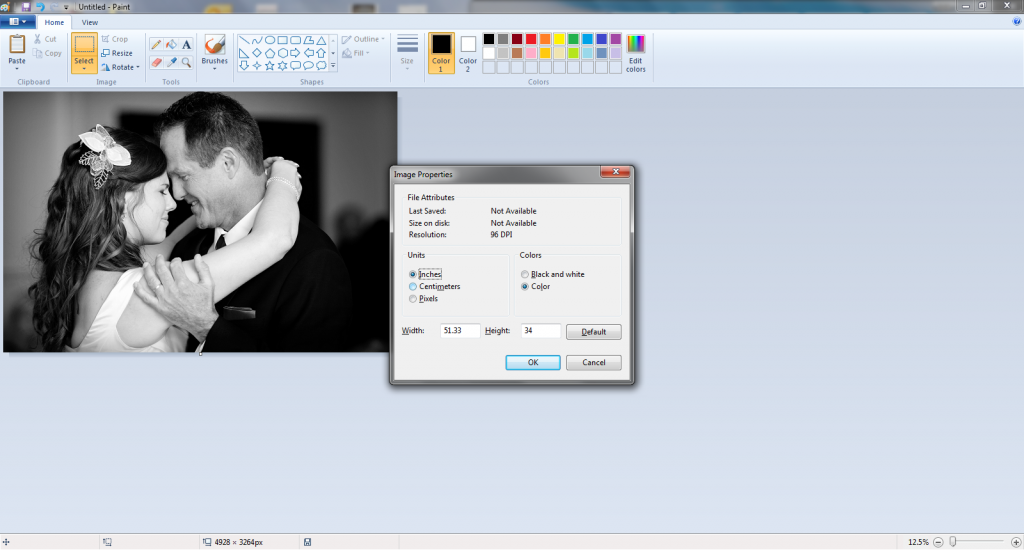
Now to find the dimensions of the picture you chose. Click “File” then “Properties”; on the image properties box, change the units from pixels to inches. Write down the image width and height then close the box.
Step 3
Now for the
hard math part. To reduce the original photo (“have” photo) to the locket photo size (“need” photo) we need to shrink by a percentage. If you’re like me, and awful at math, you can do a few trial and error prints. To save ink, select the “draft” option for printing!
Step 4
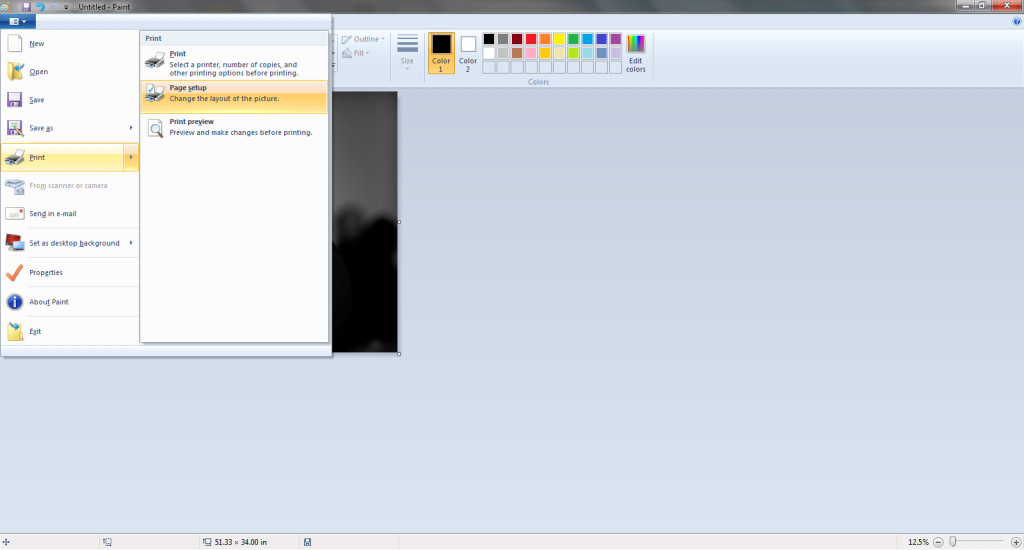
Select “File” and hover over “Print” till the side bar pops up. Find and click the “Page Setup” option from the side bar.
Step 5
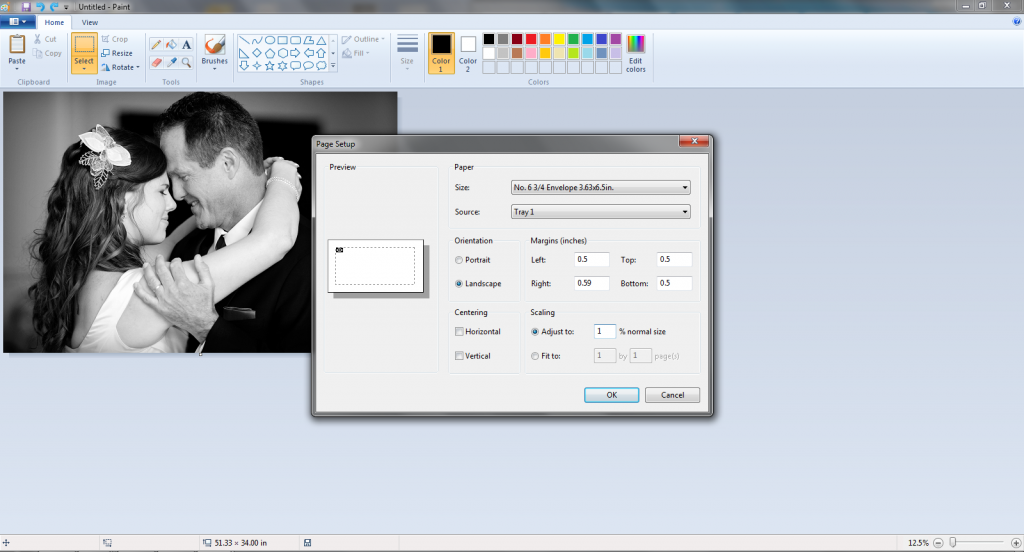
Enter the percentage you calculated (or guessed) into the ‘adjust to’ box under scaling and hit print! The picture to the top left of the box will give you a rough idea of what the scaled percentage will look like.
Microsoft Word
Step 1
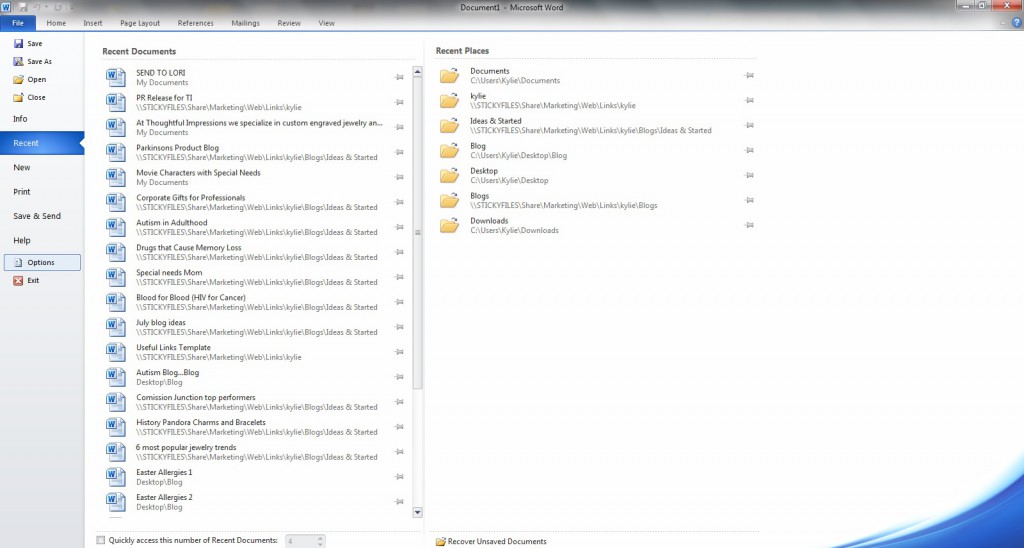
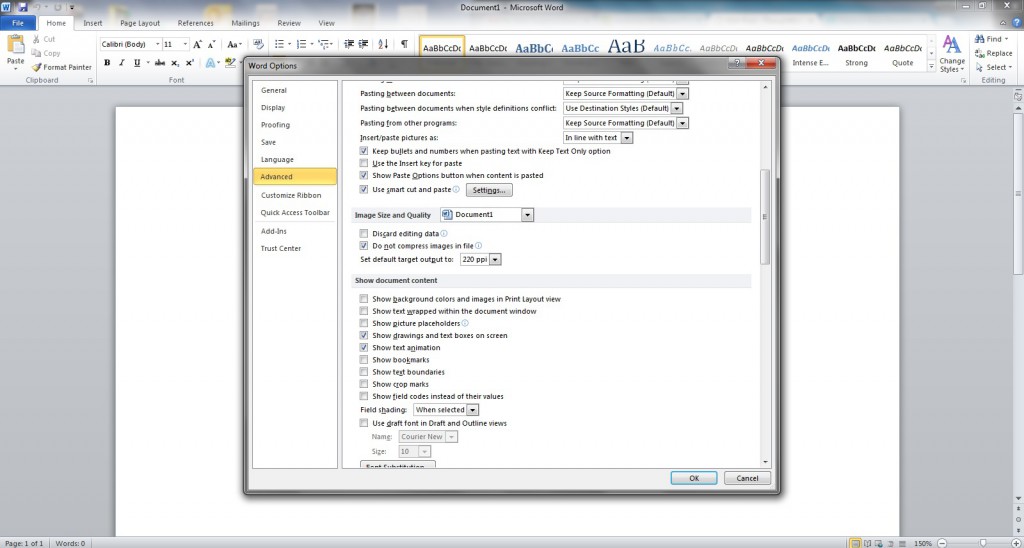
Open a blank Word document to adjust settings. To keep the resolution quality, we need to keep Word from auto compressing. Select File, Options.
Step 2
On the left side of the pop-up window, click the Advanced tab, then scroll to Image Size and Quality section. Check the box next to the ‘Do Not Compress Images in File’ box then OK.
For every new document, you will have to repeat this.
Step 3
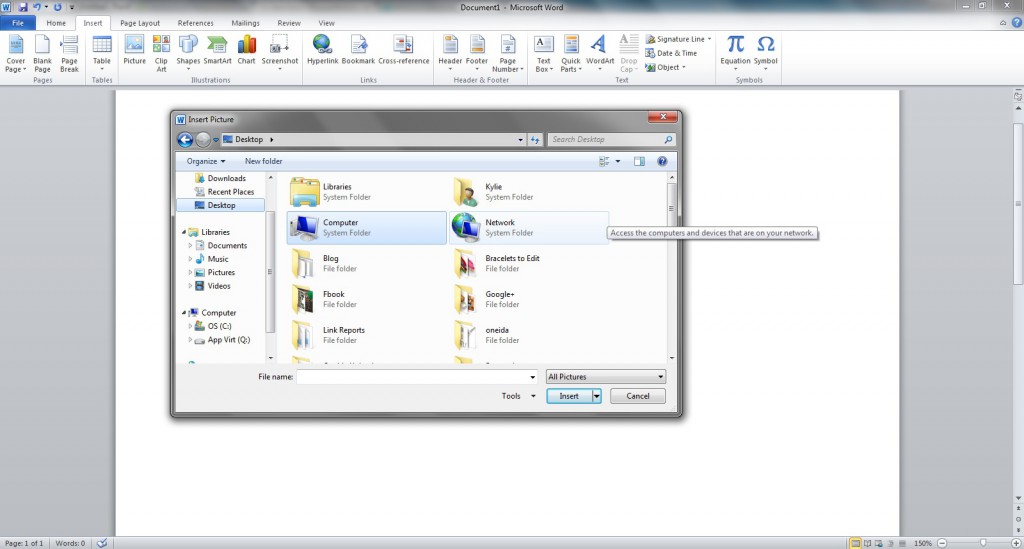
Insert your personalized locket picture by selecting the Insert tab, then click the Picture icon. Find your image and press Ok.
Step 4
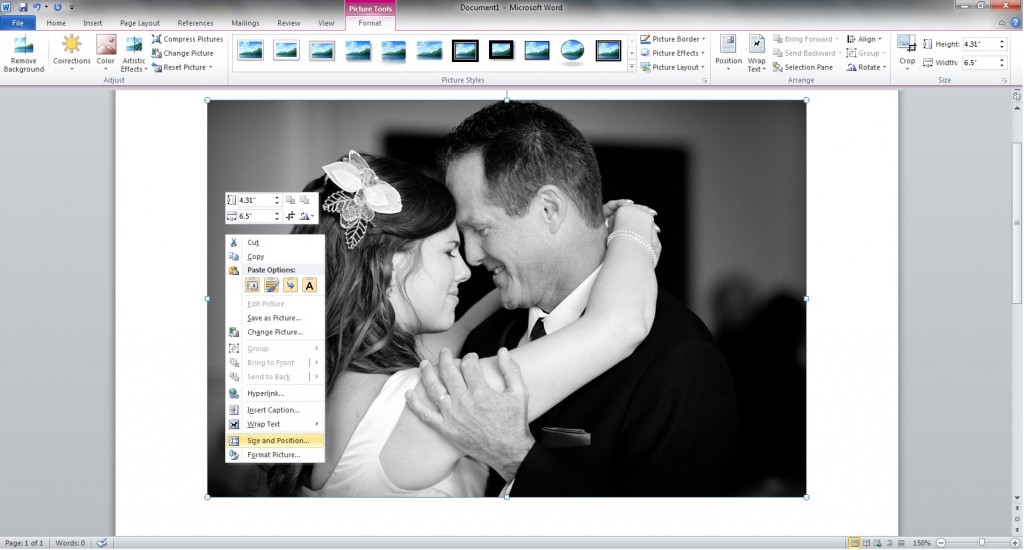
Right click on the picture and go to Size and Position to bring up a new pop up window.
Step 5
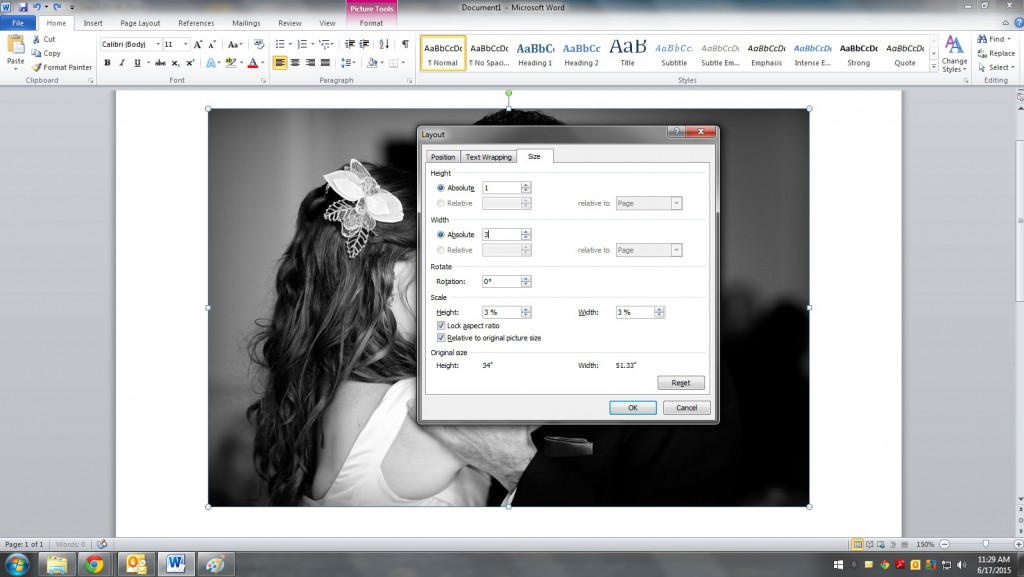
Change the Absolute height and width to the size of the locket and print!
Voila! Teeny Tiny Picture for your new Personalized Locket!
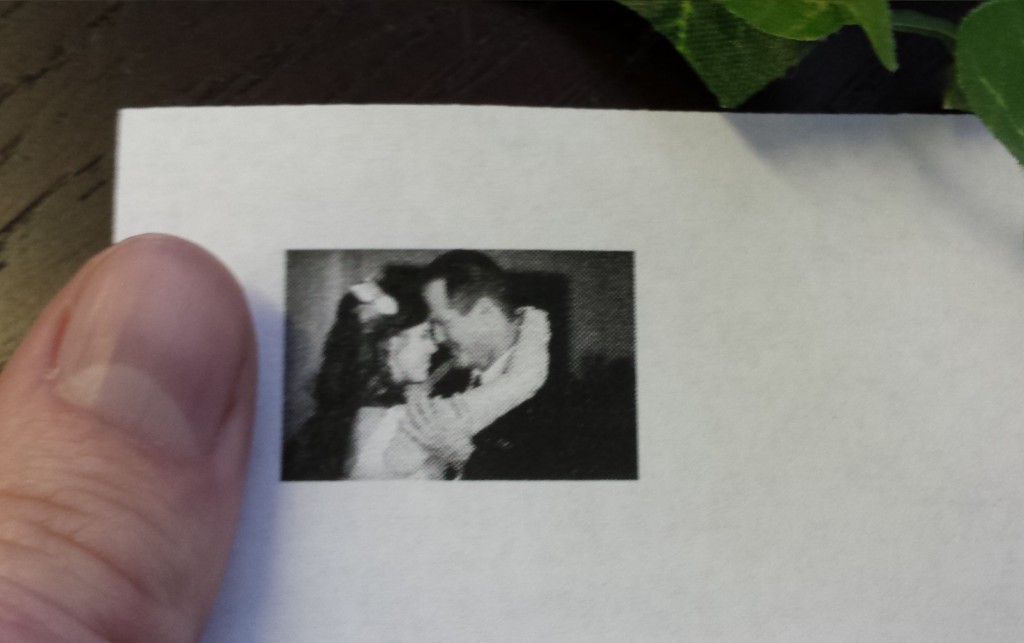
Once the picture is a perfect size, insert the top left corner into the locket and gently flex at the center to ease the rest of the edges into the frame. If the locket has a protective plastic insert, do the picture and plastic insert separately. Just be careful not to unseat the picture when inserting the plastic.
No matter what type of personalized locket you’ve fallen in love with, we can help you get the picture in!

